

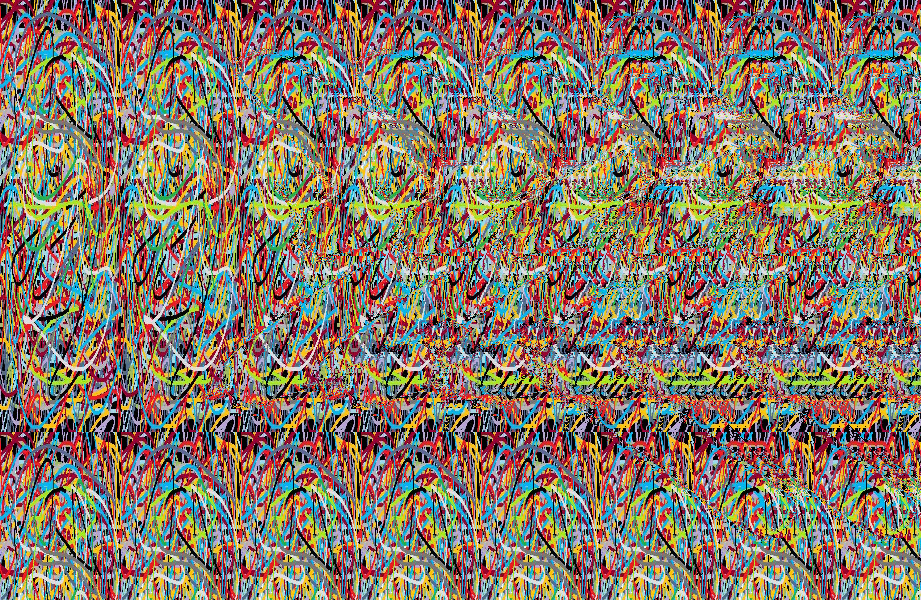
Stereograms represent a fascinating intersection of art and optical science, allowing viewers to perceive three-dimensional images from two-dimensional patterns. Often popularized through “Magic Eye” books in the 1990s, stereograms continue to captivate audiences with their unique visual illusions. This guide will walk you through the process of creating your own stereograms, from understanding the basic concepts to implementing advanced techniques.
Understanding Stereograms
Stereograms work by exploiting the way our brains process visual information from both eyes. When viewing a stereogram, each eye focuses on different parts of the repeating pattern, creating a disparity that the brain interprets as depth. There are several types of stereograms:
- Autostereograms: These use a single image to create the illusion of depth
- Single Image Random Dot Stereograms (SIRDS): These utilize random dots to generate the 3D effect
- Single Image Stereograms (SIS): These employ a single image without relying on random dots
Essential Tools for Stereogram Creation
Before starting your stereogram project, you’ll need to gather several tools:
- Image Editing Software: Programs like Adobe Photoshop, GIMP, or even Microsoft Paint can handle basic image preparation tasks
- Stereogram Creation Software: Specialized tools such as Stereogram Explorer or STMaker are designed specifically for generating stereograms
- 3D Modeling Software (Optional): For more advanced projects, applications like Blender can help create 3D models from 2D images
Step-by-Step Guide to Creating a Basic Stereogram
Step 1: Select Your Base Image
Begin by choosing an image that will serve as the foundation for your stereogram. For beginners, simple geometric shapes like circles, squares, or triangles provide the best results. As you gain experience, you can progress to more complex designs.
Step 2: Prepare Your Image
Image preparation is crucial for creating an effective stereogram:
- Edit the Image: Use your chosen editing software to enhance the image with gradients or blur effects, which can improve depth perception
- Convert to Grayscale (if necessary): If you’ll be working with a grayscale disparity map, you’ll need to convert your image accordingly
Step 3: Create a Depth Map
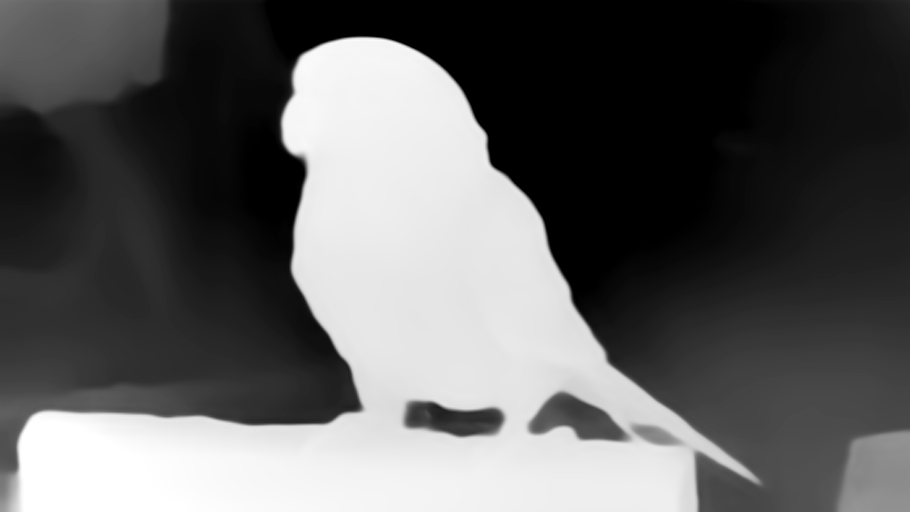
The depth map is perhaps the most important element in creating complex stereograms. It defines the perceived depth of different parts of your image:
- Darker areas in the depth map will appear further away from the viewer
- Lighter areas will appear closer to the viewer
- The contrast between light and dark areas determines how dramatic the depth effect will be
You can create a depth map manually using grayscale values in your image editing software, carefully considering which elements should appear closer or farther away.
Step 4: Generate the Stereogram
Now it’s time to use dedicated stereogram software to create your 3D illusion:
- Install your chosen stereogram creation software
- Import your prepared image and depth map
- Configure the settings according to your preferences (pattern type, dot density, etc.)
- Generate the stereogram following the software’s specific instructions
- Preview the result to ensure the 3D effect is visible
Step 5: View and Share Your Stereogram
Once you’ve generated your stereogram:
- Save the file in an appropriate format (usually PNG or JPEG)
- Practice viewing your creation using one of two techniques:
- Wall-eyed technique: Focus on a point beyond the image
- Cross-eyed technique: Converge your eyes as if looking at something close
- Share your creation with friends and provide viewing instructions
Advanced Stereogram Techniques
Working with 3D Models
For those looking to create more sophisticated stereograms:
- Use Blender or similar 3D modeling software to create or import a 3D model
- Adjust the model’s position, lighting, and other properties
- Export the model as an OBJ file or other compatible format
- Import the 3D model into your stereogram software
- Generate the stereogram based on the 3D model’s depth information
Adding Textured Patterns
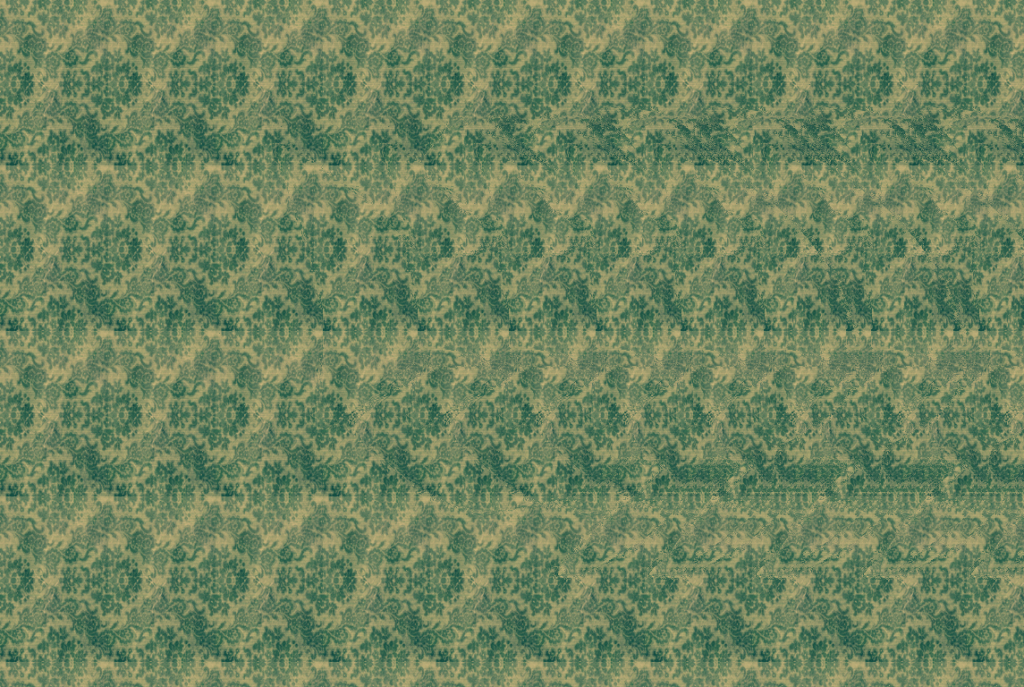
The pattern used in your stereogram can significantly impact the final result:
- Repeating Patterns: Create a repeating pattern that will make up the background of your stereogram
- Textured Backgrounds: Use natural textures like wood grain, fabric, or clouds for more organic-looking stereograms
- Thematic Elements: Incorporate thematic elements relevant to your hidden 3D image
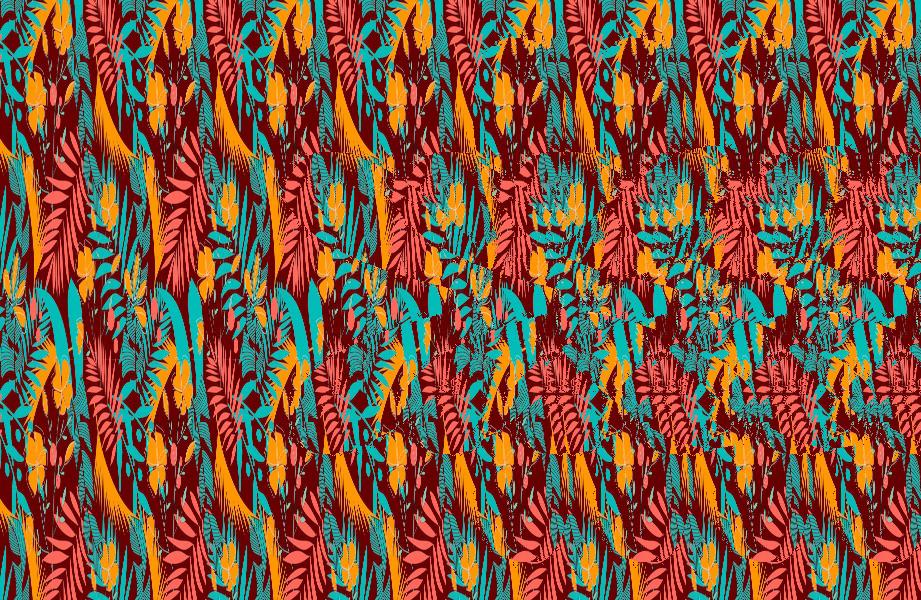
Color and Contrast Considerations
While many stereograms use random dots, you can enhance your creations with color:
- Use colors that provide sufficient contrast for easy viewing
- Consider using complementary colors to enhance the visual experience
- Experiment with gradients and color variations to add visual interest
Troubleshooting Common Issues
If your stereogram isn’t working as expected, consider these potential solutions:
- Insufficient Depth Contrast: Enhance the contrast in your depth map
- Too Complex: Simplify your 3D object or design for clearer results
- Pattern Issues: Adjust the pattern density or size for better visibility
- Viewing Difficulty: Practice different viewing techniques or adjust the stereogram’s parameters
Tips for Stereogram Beginners
- Start with simple shapes before attempting complex designs
- Practice viewing stereograms regularly to train your eyes and brain
- Experiment with different patterns, textures, and colors
- Share your creations with others to get feedback
- Study existing stereograms to understand effective techniques
Conclusion
Creating stereograms combines artistic creativity with technical understanding, resulting in fascinating optical illusions that can engage and amaze viewers. By following this guide, you can begin your journey into stereogram creation, progressing from simple designs to complex 3D illusions. With practice and experimentation, you’ll develop the skills to create stunning stereograms that challenge perception and showcase the fascinating relationship between 2D patterns and 3D vision.